How To Run X Ad Campaigns: A Beginner’s Guide
Explore our new guide series dedicated to mastering X Ads, tailored for entrepreneurs and business owners in the MENA region.
We're launching a new series of detailed guides on running effective digital ads, starting with X. Our goal is to help entrepreneurs, solopreneurs and business owners across MENA grow and scale their businesses.
What We Will Cover in this Guide to X Ads
- Why Advertise on X: The benefits of advertising on the platform.
- Getting Started: How to set up your X Ads account and billing.
- Running Ads: Step-by-step guides for both quick simple setups and advanced campaigns.
- Conversion Tracking: How to set up and test tracking for your ads.
- Why Advertise on X?
Advertising on X connects you with a highly engaged, influential audience.
With over 535 million global users and an average of 30.9 minutes spent daily, X is the top platform for discovery. It's where you reach startup founders, decision-makers, and thought leaders actively seeking innovative ideas. Tap into this network, amplify your message, and drive real business results.
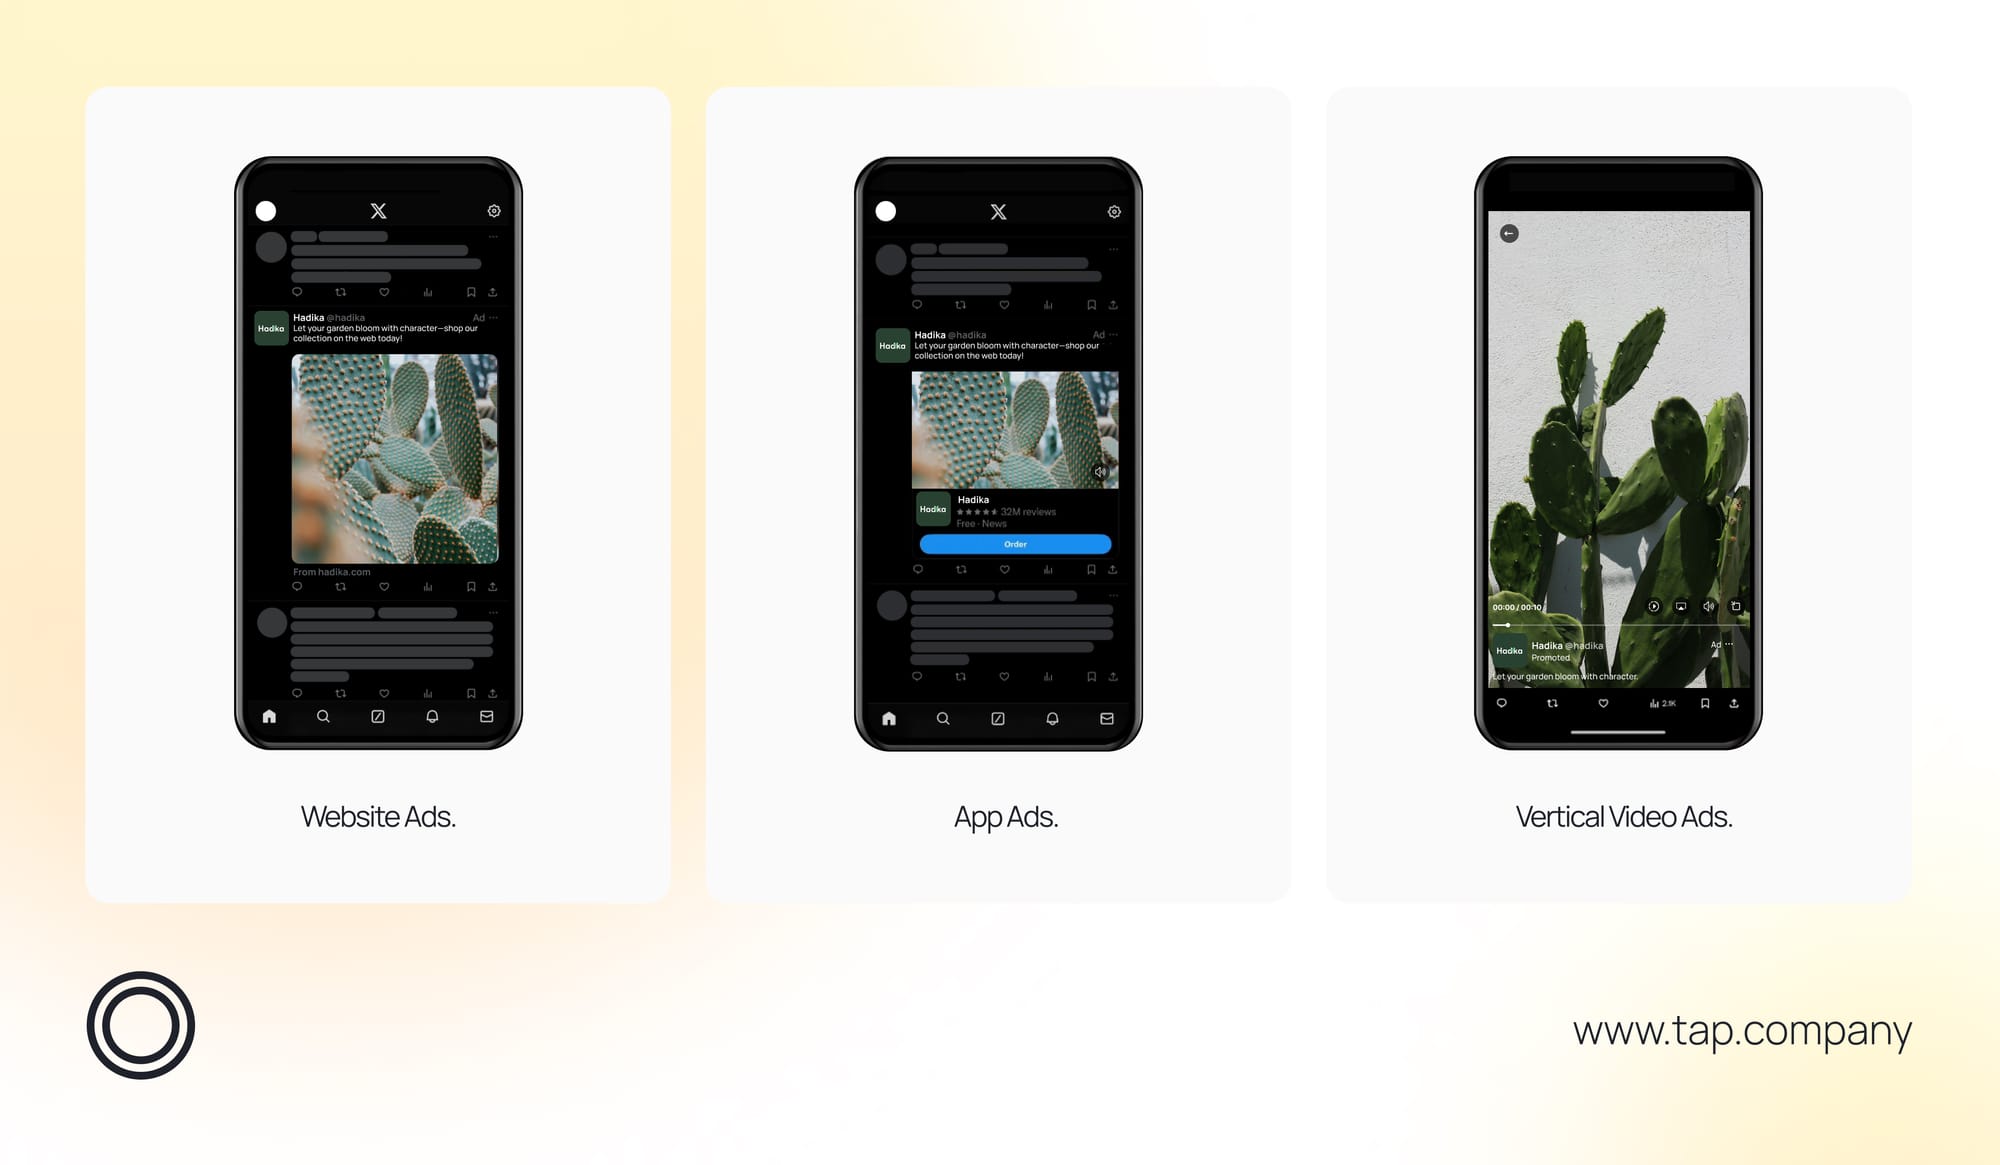
Whether your goal is to drive website traffic, increase brand awareness, or boost engagement, X’s diverse ad formats—ranging from video to image-based ads—make it easy to create an impactful campaign in just minutes.
X also provides unique targeting options, allowing you to tailor your campaigns to specific demographics, interests, and behaviors.
Target with Precision:
- Choose where your ads appear—mobile, desktop, iOS, or Android.
- Engage users based on their actions or interests, like tech, fashion, or finance.
- Target specific regions, cities, or languages for maximum relevance.
- Reach users discussing or searching for topics related to your brand.
- Expand your reach by targeting users similar to your customers or using your own data for high conversions.
Engage in Real-Time:
- Insert your brand into real-time conversations for instant visibility.
- Boost organic reach by enabling retweets at no extra cost.
- Engage directly in ongoing conversations with X’s influential users.
Utilize Engaging Ad Formats:
- Integrate video ads into timelines or promote app downloads.
- Target live events or trending moments to tell a cohesive, engaging story.
- What You Need to Start Advertising on X?
Here's a checklist of the key things required:
- An Active X Account: You must have an active X account. If you don’t already have one, sign up at www.x.com. And you can use the following X account guidelines to help you set up your company account. Also you can benefit from The X Marketing Calendar to keep track of all the events in your region.
- Campaign Goals and Objectives: Clearly define what you want to achieve with your campaign (e.g., website traffic, brand awareness, video views).
- A Payment Method: You’ll need to provide billing information, such as a valid credit card or PayPal account, to pay for your ad spend.
- Ad Creatives: Prepare high-quality media, including images, videos, or GIFs, along with engaging ad copy. Ensure your media meets X’s creative ad specs, and X’s advertising guidelines.
- Target Audience: Have a good understanding of your target audience’s demographics, interests, and behaviors to optimize your ad targeting.
- Tracking Setup (Optional): If you want to track conversions, you’ll need to install the X Ads Pixel on your website or link to a mobile measurement partner for app campaigns (we will explain this section in detail later in the guide).

Once you have these ready, you can confidently set up and launch your X ad campaigns!
- Setting Up an X Ads Account and Billing
Step 1: Create Your X Ads Account
- Go to X.com
Open your browser and visit www.twitter.com. - Log in or Create an Account
- If you already have an account, click on the Login button in the top-right corner.
- If you don’t have an account, click Sign Up and follow the instructions to create one.
- Navigate to X Ads
Once you’re logged in:- Click on your profile icon (top right).
- In the dropdown menu, select x Ads.
- Alternatively, go directly to ads.x.com.
- Select Your Country and Time Zone
- You will be prompted to select your country and time zone.
- Click on the dropdown menus to choose the correct options.
- Once you select these, click Next. Important: This cannot be changed later.
- Skip Campaign Creation (Optional)
- X may prompt you to create a campaign right away.
- If you’re not ready, click Skip to move directly to the Ads dashboard.
Step 2: Add Billing Information
- Go to the Ads Dashboard
- You should now be on the Ads dashboard (if not, visit ads.X.com).
- On the left-hand menu, click Billing.
- Add a Payment Method
- In the billing section, click on Add Payment Method.
- You’ll be prompted to add a Credit Card, Debit Card, or PayPal account.
- Input the necessary details.
- Choose Payment Preferences
- After entering payment info, you’ll need to select how you want to be billed.
- Choose between:
- Automatic Payments: Charges will be applied once you reach a set spending threshold.
- Manual Payments: Prepay a specific amount, and X will deduct from that balance.
- Once done, click Save.
You are now set up with your X Ads account and ready to create your first campaign.
- Setting Up, Tracking, and Running Ads on X
Once you have set up billing, you’re ready to start creating ads. You can choose between Simple or Advanced campaign setups.
Simple Version: A Quick Setup for Fast Campaigns!
Step 1: Choose Your Campaign Objective
- Go to Ads Dashboard
- Go to ads.X.com and log in.
- In the left-hand menu, click Create Campaign.
- choose Simple Version.
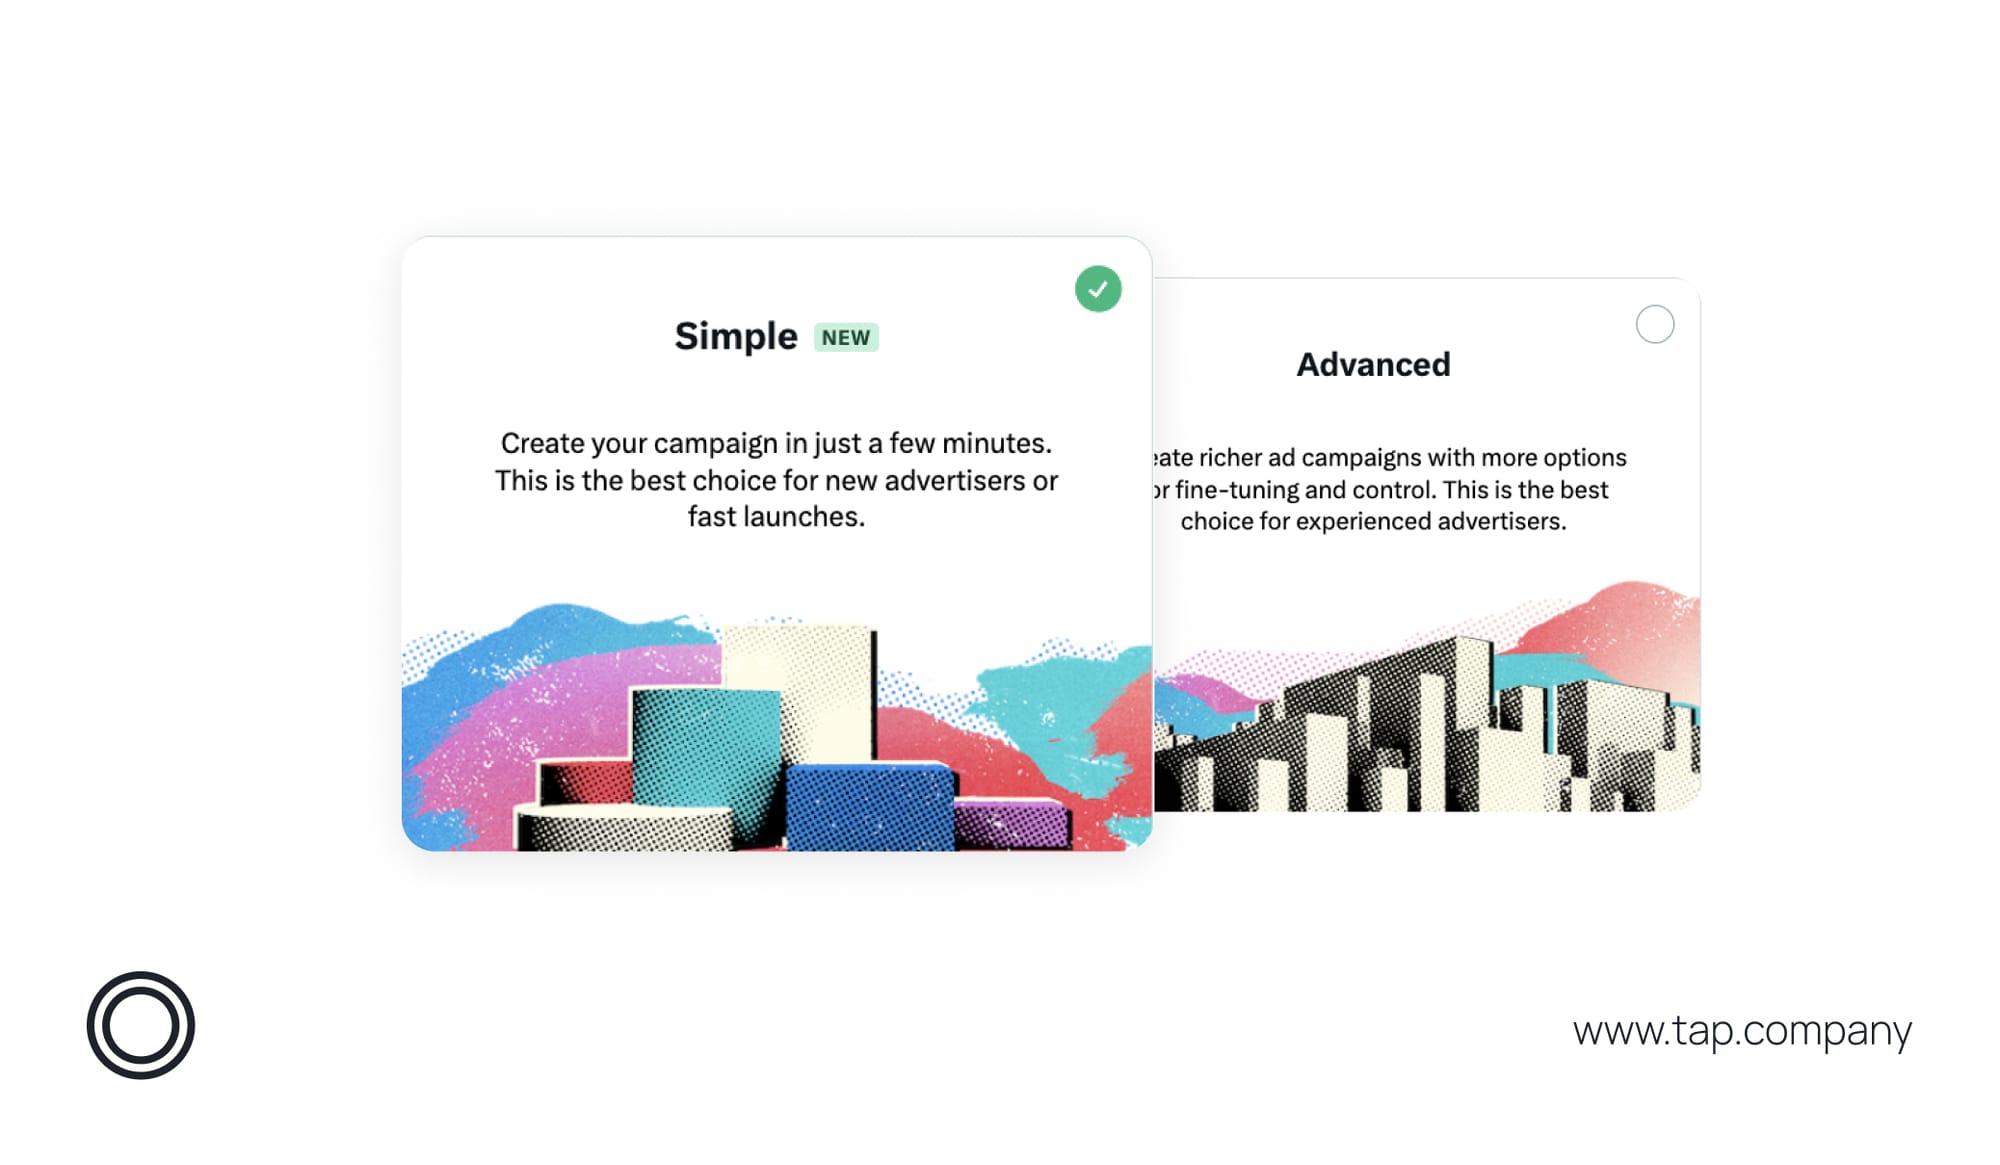
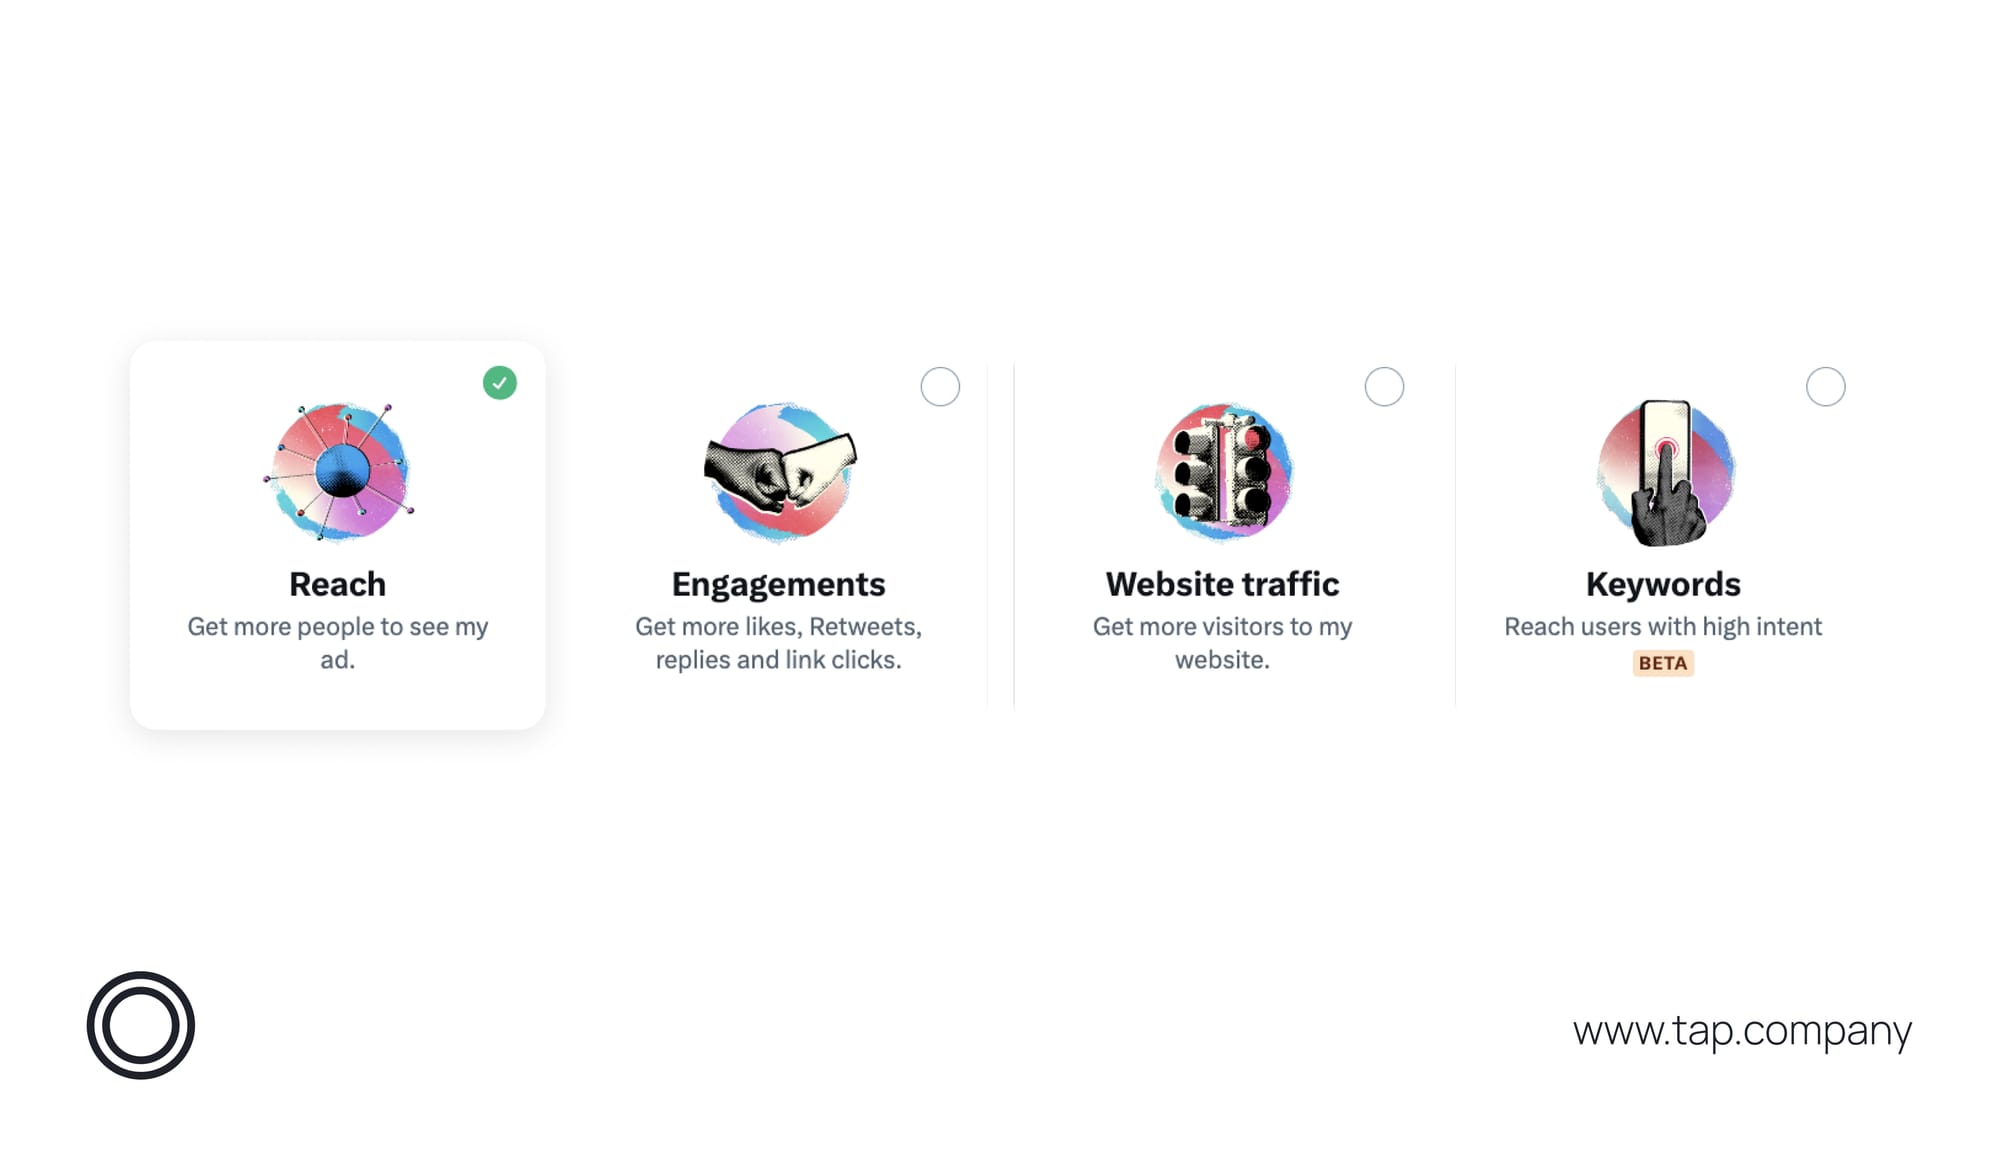
2. Select Campaign Objective You’ll see several campaign objectives, including:
- Reach: Maximize the number of people who see your ad.
- Engagements: Drive retweets, likes, replies, and clicks.
- Website Traffic: Drive users to your website.
- Keywords (beta): Drive traffic based on keywords.
- Select the one that best aligns with your goals, then click Next.
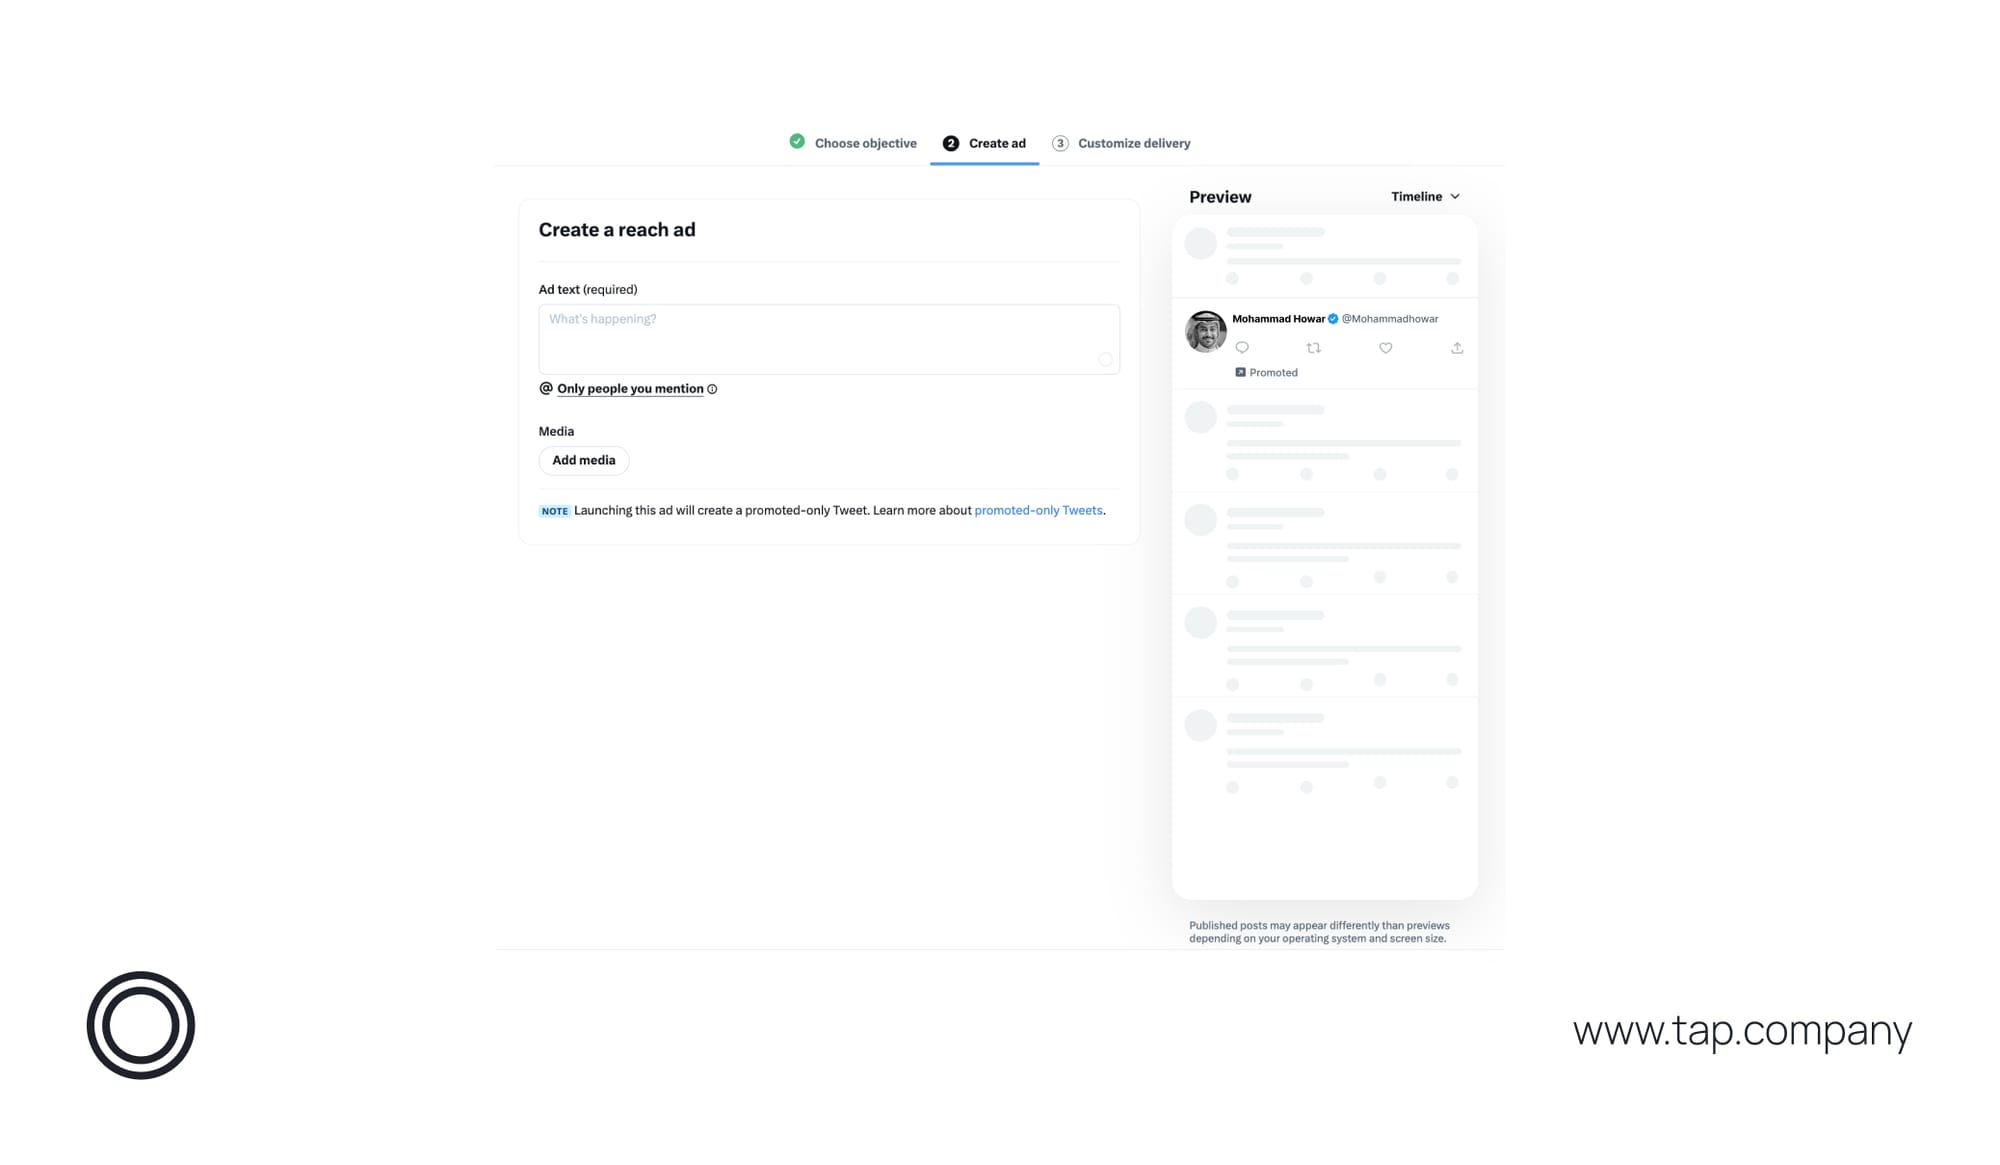
Step 2: Create Your Ad
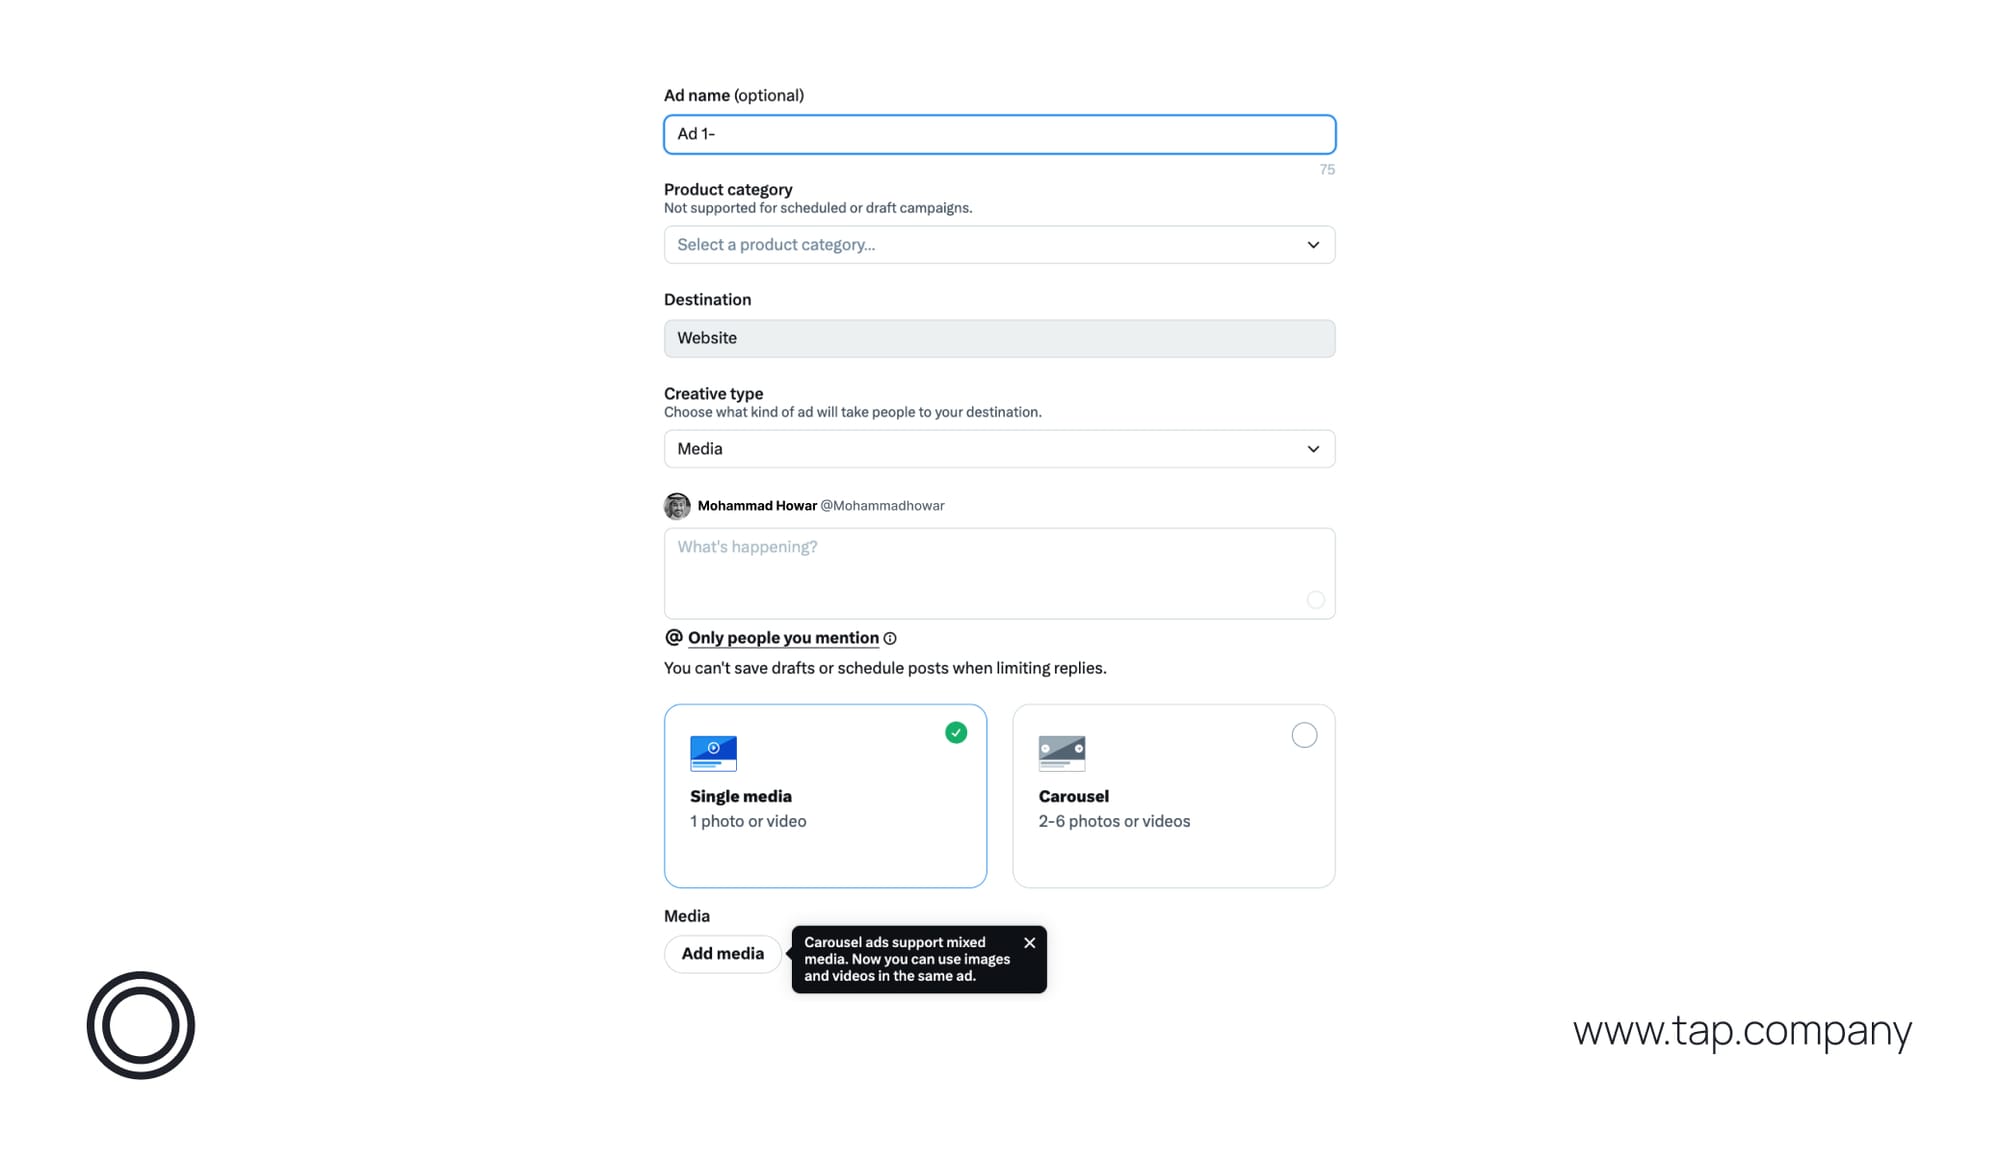
- First select whether to create a new ad or use an existing one.
- Create Your Ad Text
- In the ad creation screen, enter your ad text.
- Keep it concise (preferably 280 characters), and add a Call-to-Action (CTA) (e.g., "Shop Now" or "Learn More").
- Add Media
- Click on Add Media to upload an image or video.
- Select files from your computer and click Open.
- You’ll see a preview of how your ad will look with the media attached.
- Select Promoted-Only (Optional)
- If you don’t want your ad to appear as an organic Tweet, check the Promoted-Only box.
- Click Next
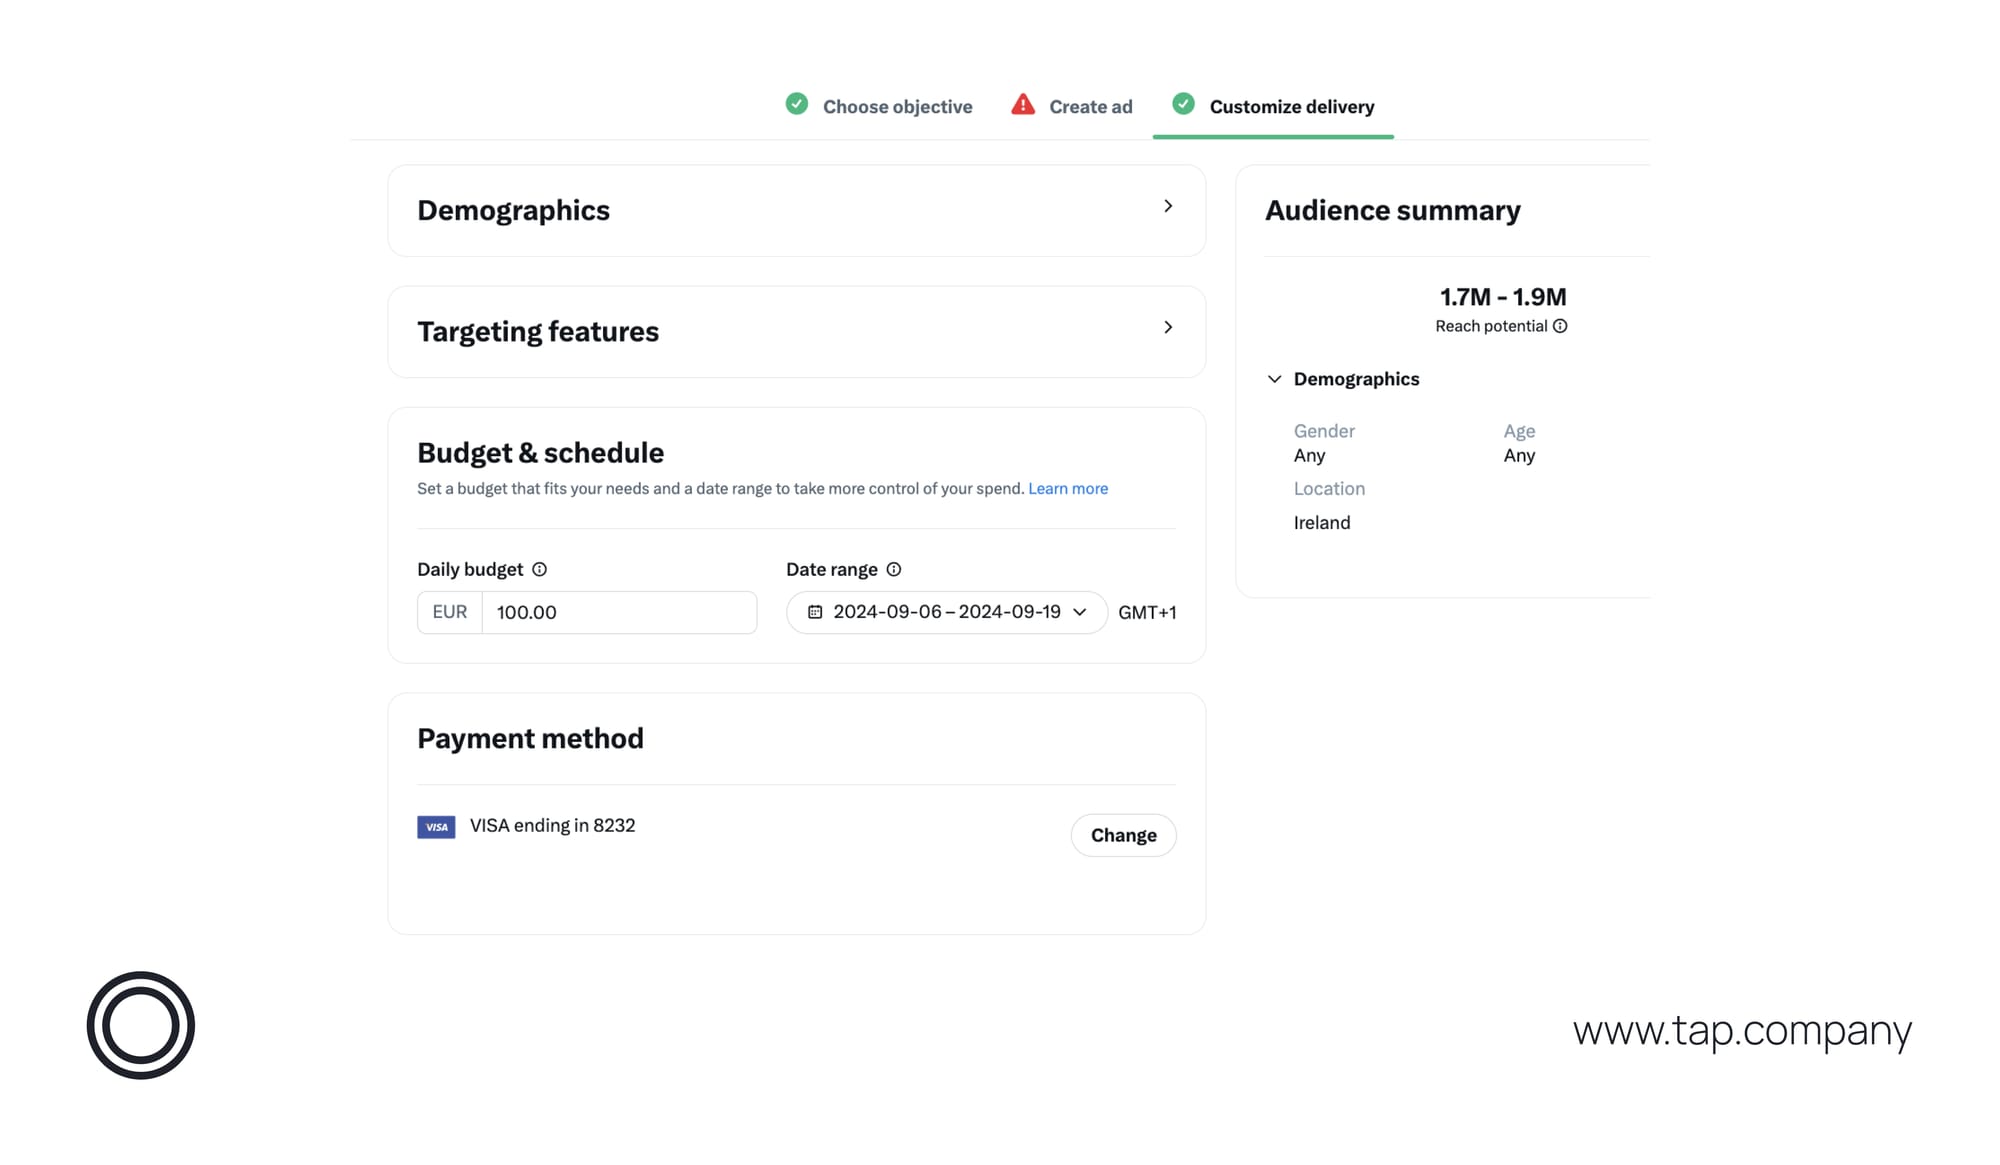
Step 3: Customize Delivery
- Select Audience Targeting
- You’ll see options to target your audience based on:
- Demographics: Choose gender, age, and language.
- Location: Enter countries, states, or cities where you want your ad to appear.
- Set these as per your campaign's needs.
- You’ll see options to target your audience based on:
- Set Budget and Schedule
- Daily Budget: Set the amount you’re willing to spend per day.
- Total Budget: Set a total limit for the entire campaign.
- Run Dates: Choose start and end dates.
- Review and Launch
- Once you’ve set your targeting, budget, and schedule, click Review.
Double-check your settings and click Launch Campaign.
Second: Advanced Version: Full Control Over Campaigns
For solopreneurs who want more control over their campaigns, use the advanced setup.
Step 1: Select Your Campaign Objective
- Go to Ads Dashboard
- Go to ads.X.com and log in.
- In the left-hand menu, click Create Campaign.
- choose Advanced Version.
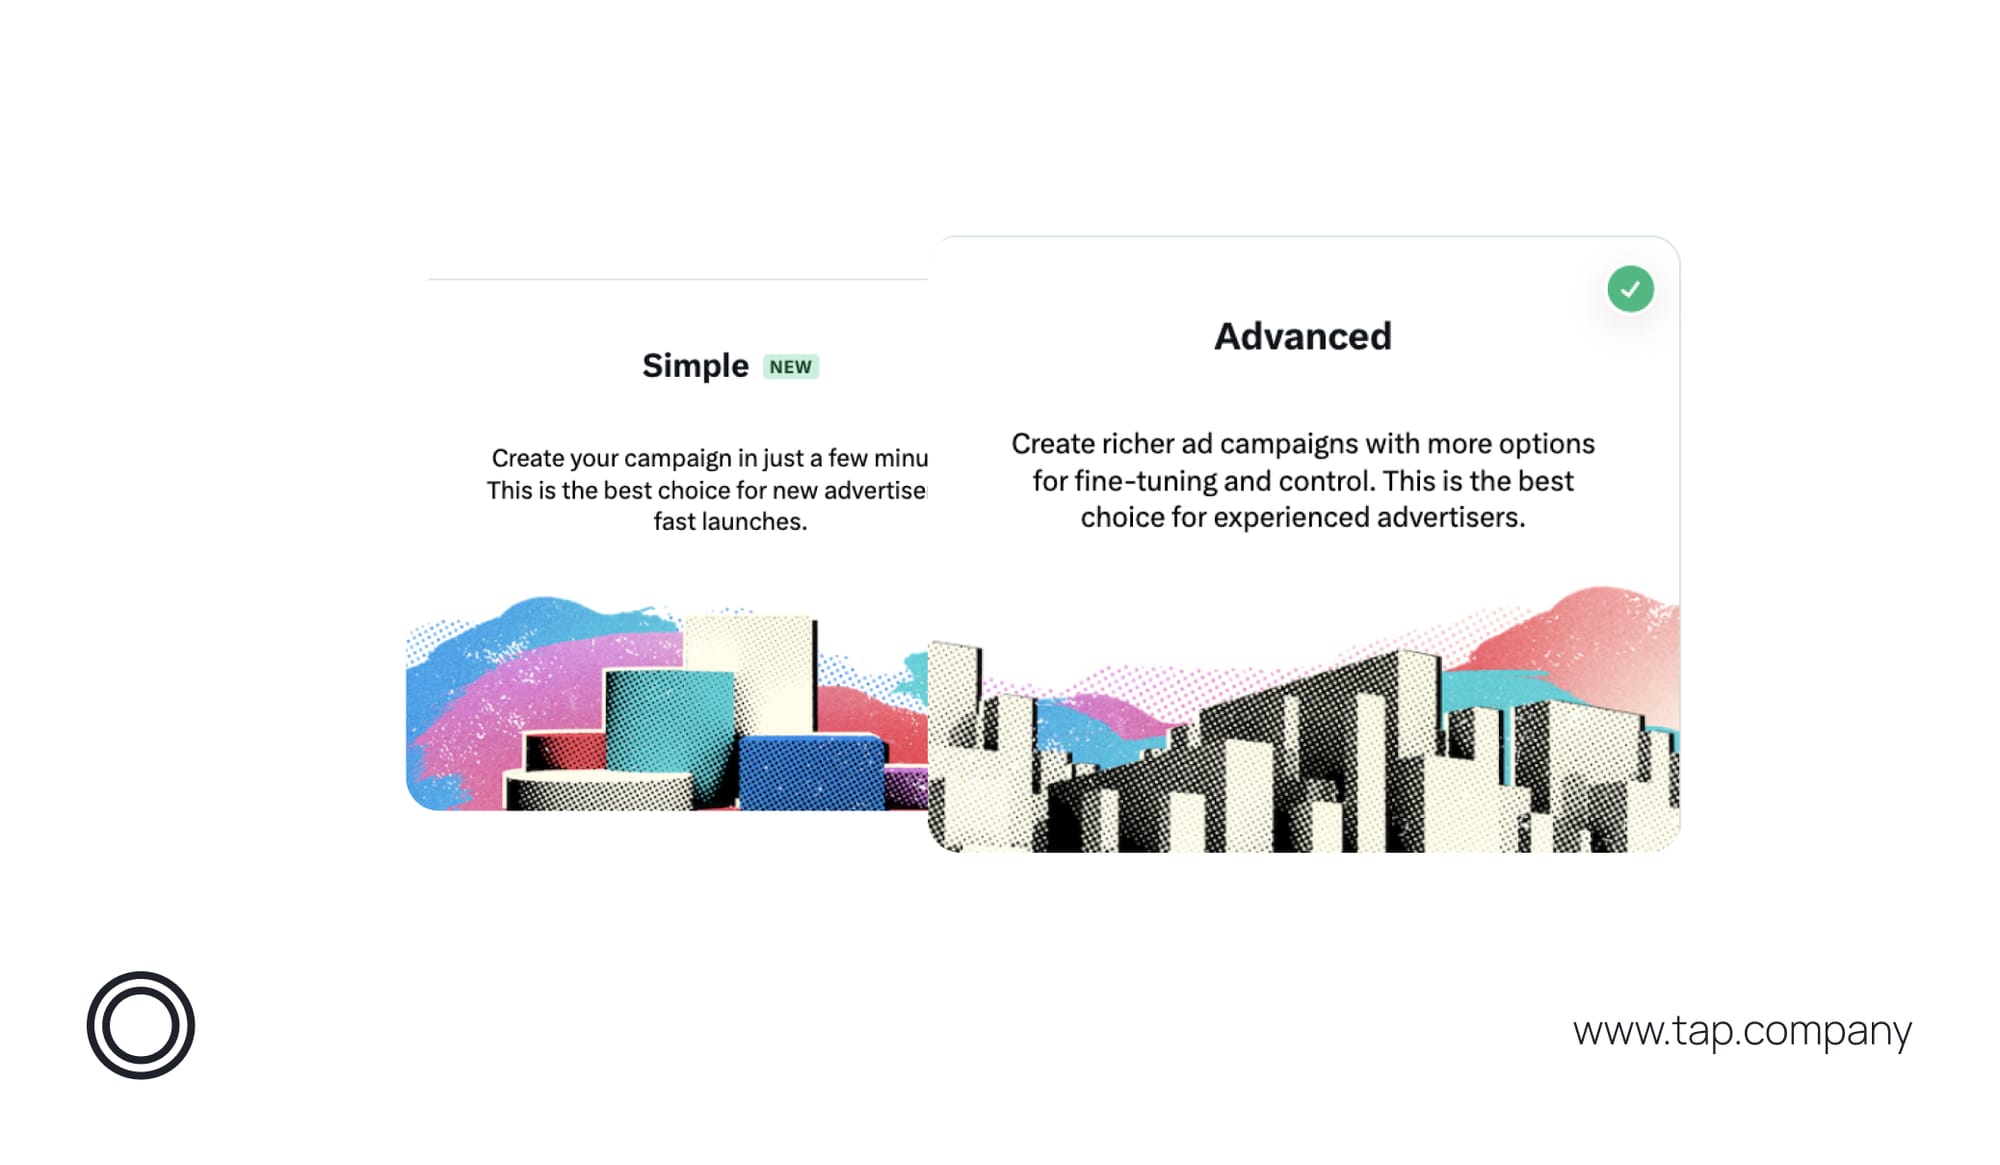
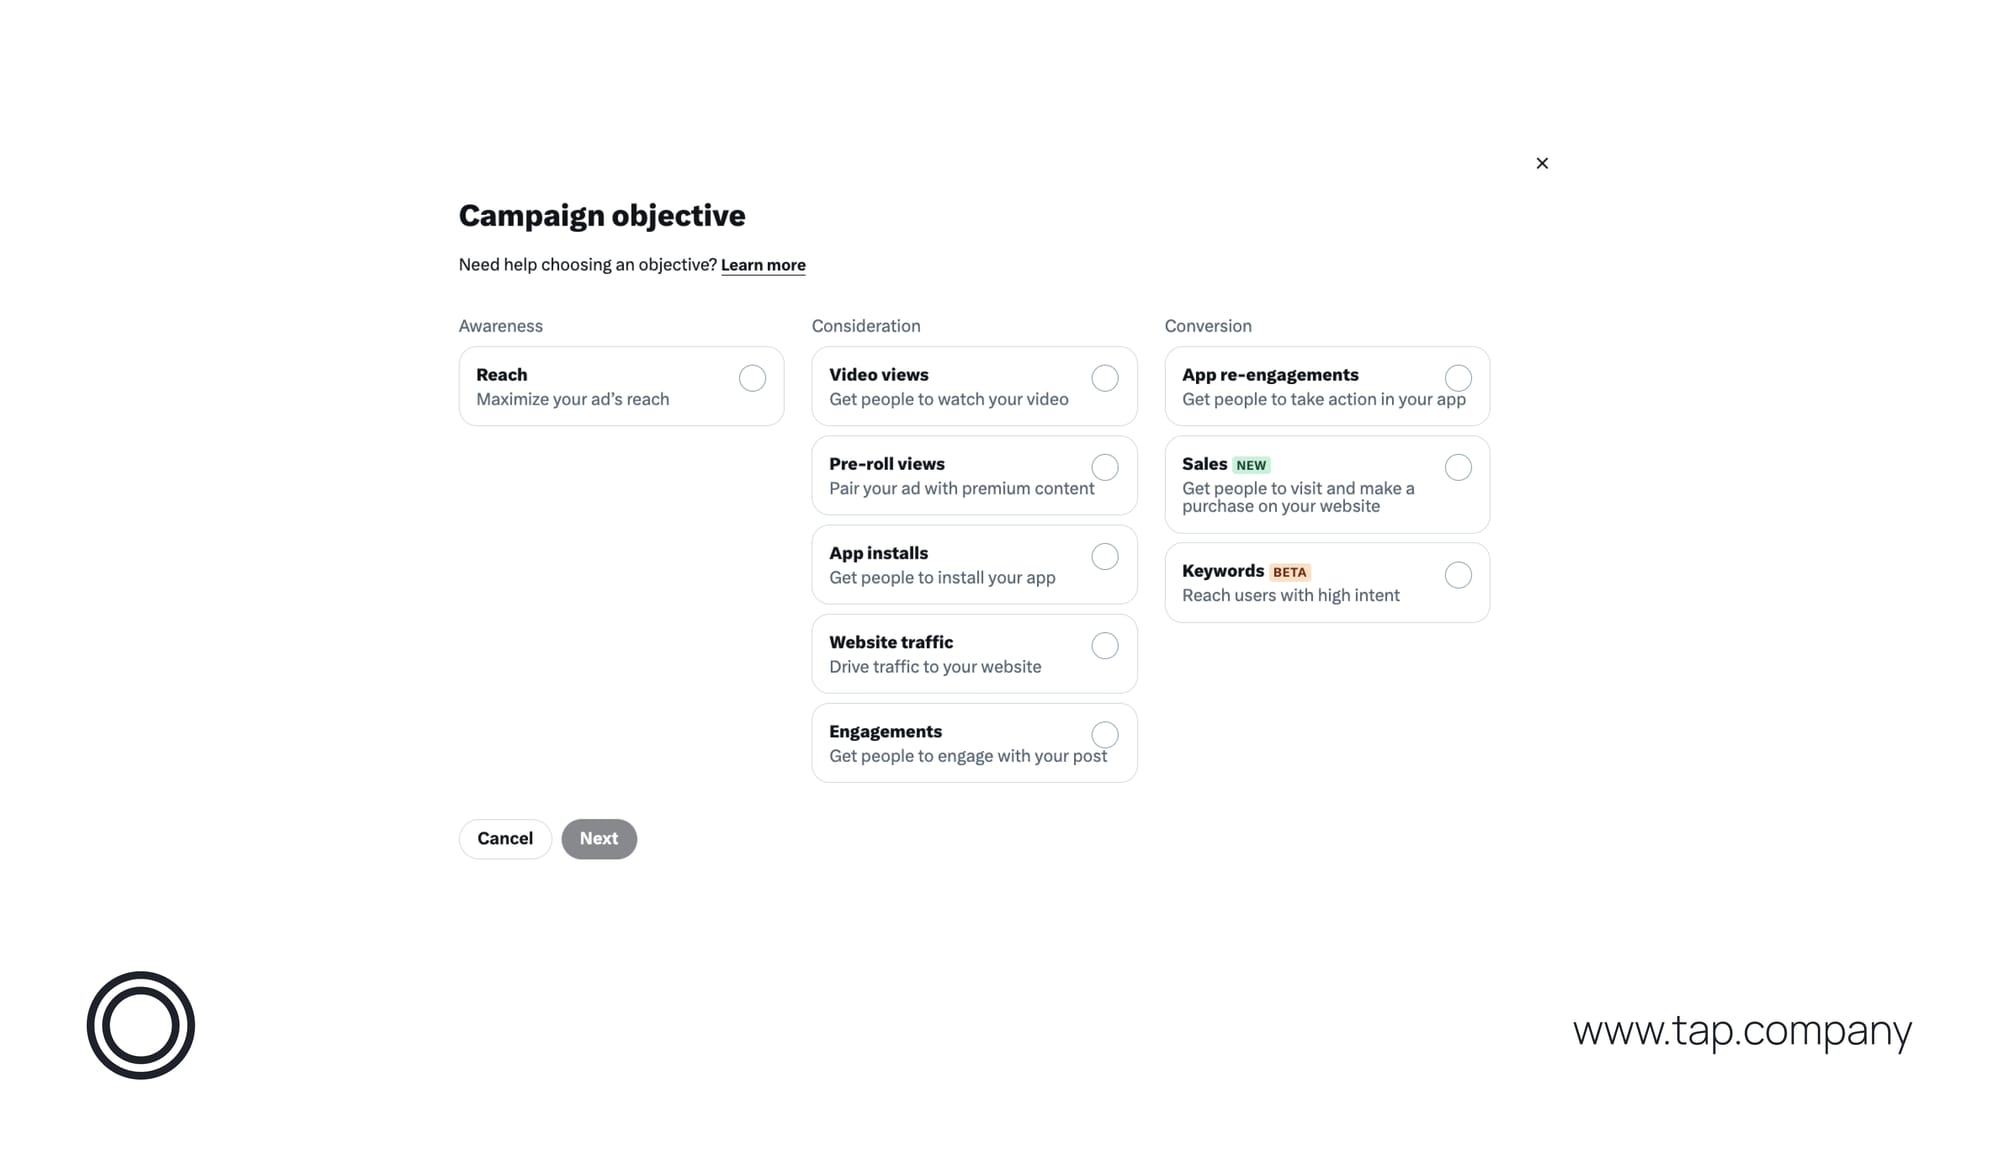
2. Select Advanced Campaign Objectives In addition to the basic options, you’ll see more advanced campaign objectives:
- Reach: Maximize the number of people who see your ad.
- Engagements: Drive retweets, likes, replies, and clicks.
- Website Traffic: Drive users to your website.
- Keywords (beta): Drive traffic based on keywords.
- App Installs: Encourage app downloads.
- Followers: Increase your follower count.
Select the one that best aligns with your goals, then click Next.
Step 2: Enter Campaign Details
Now it's time to enter your campaign details as below:
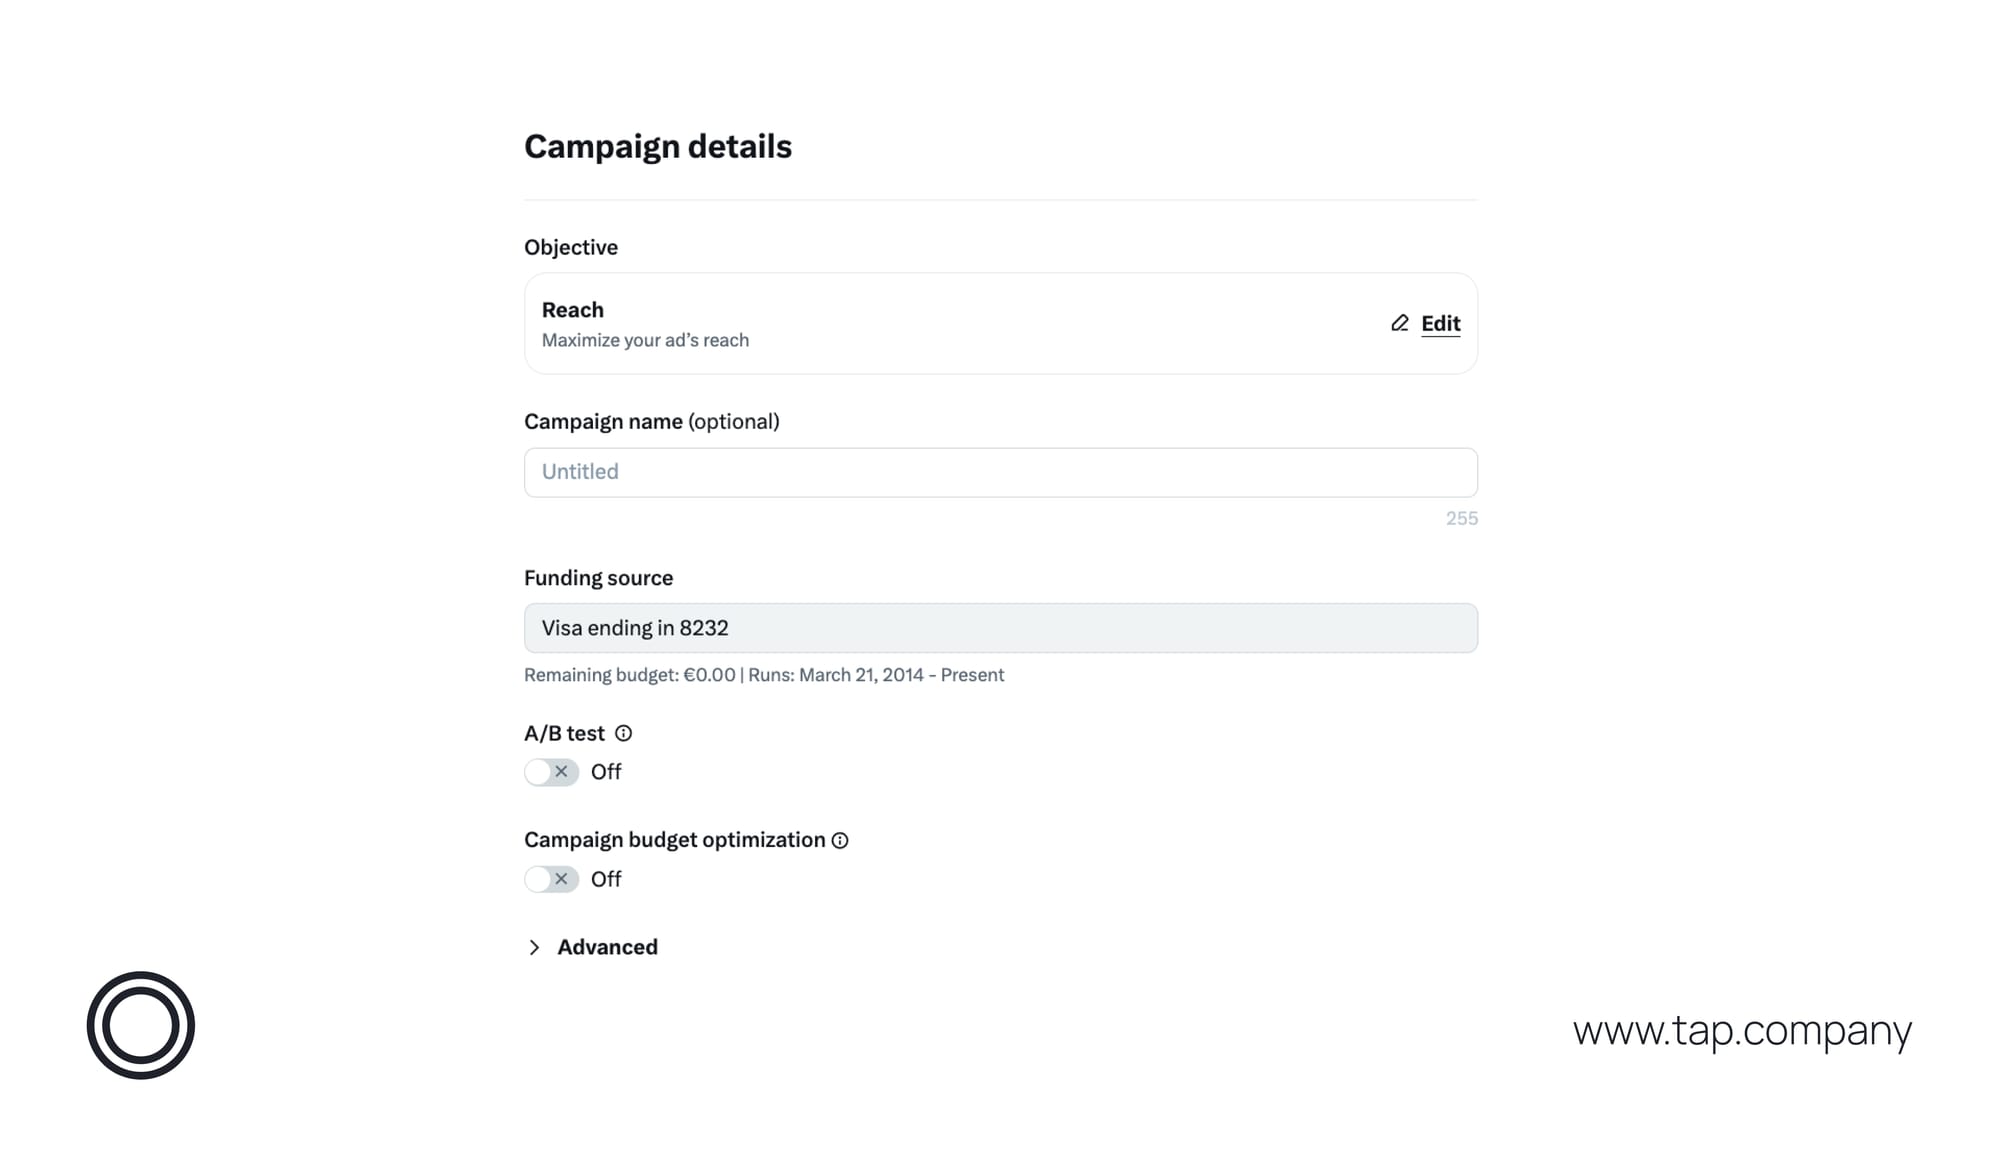
- Name your campaign (optional).
- Opt for an A/B creative test.
- Set Campaign Budget Optimization (CBO) to manage budget at the campaign or ad group level (cannot be changed later).
- Click Next.
Step 3: Create Ad Groups
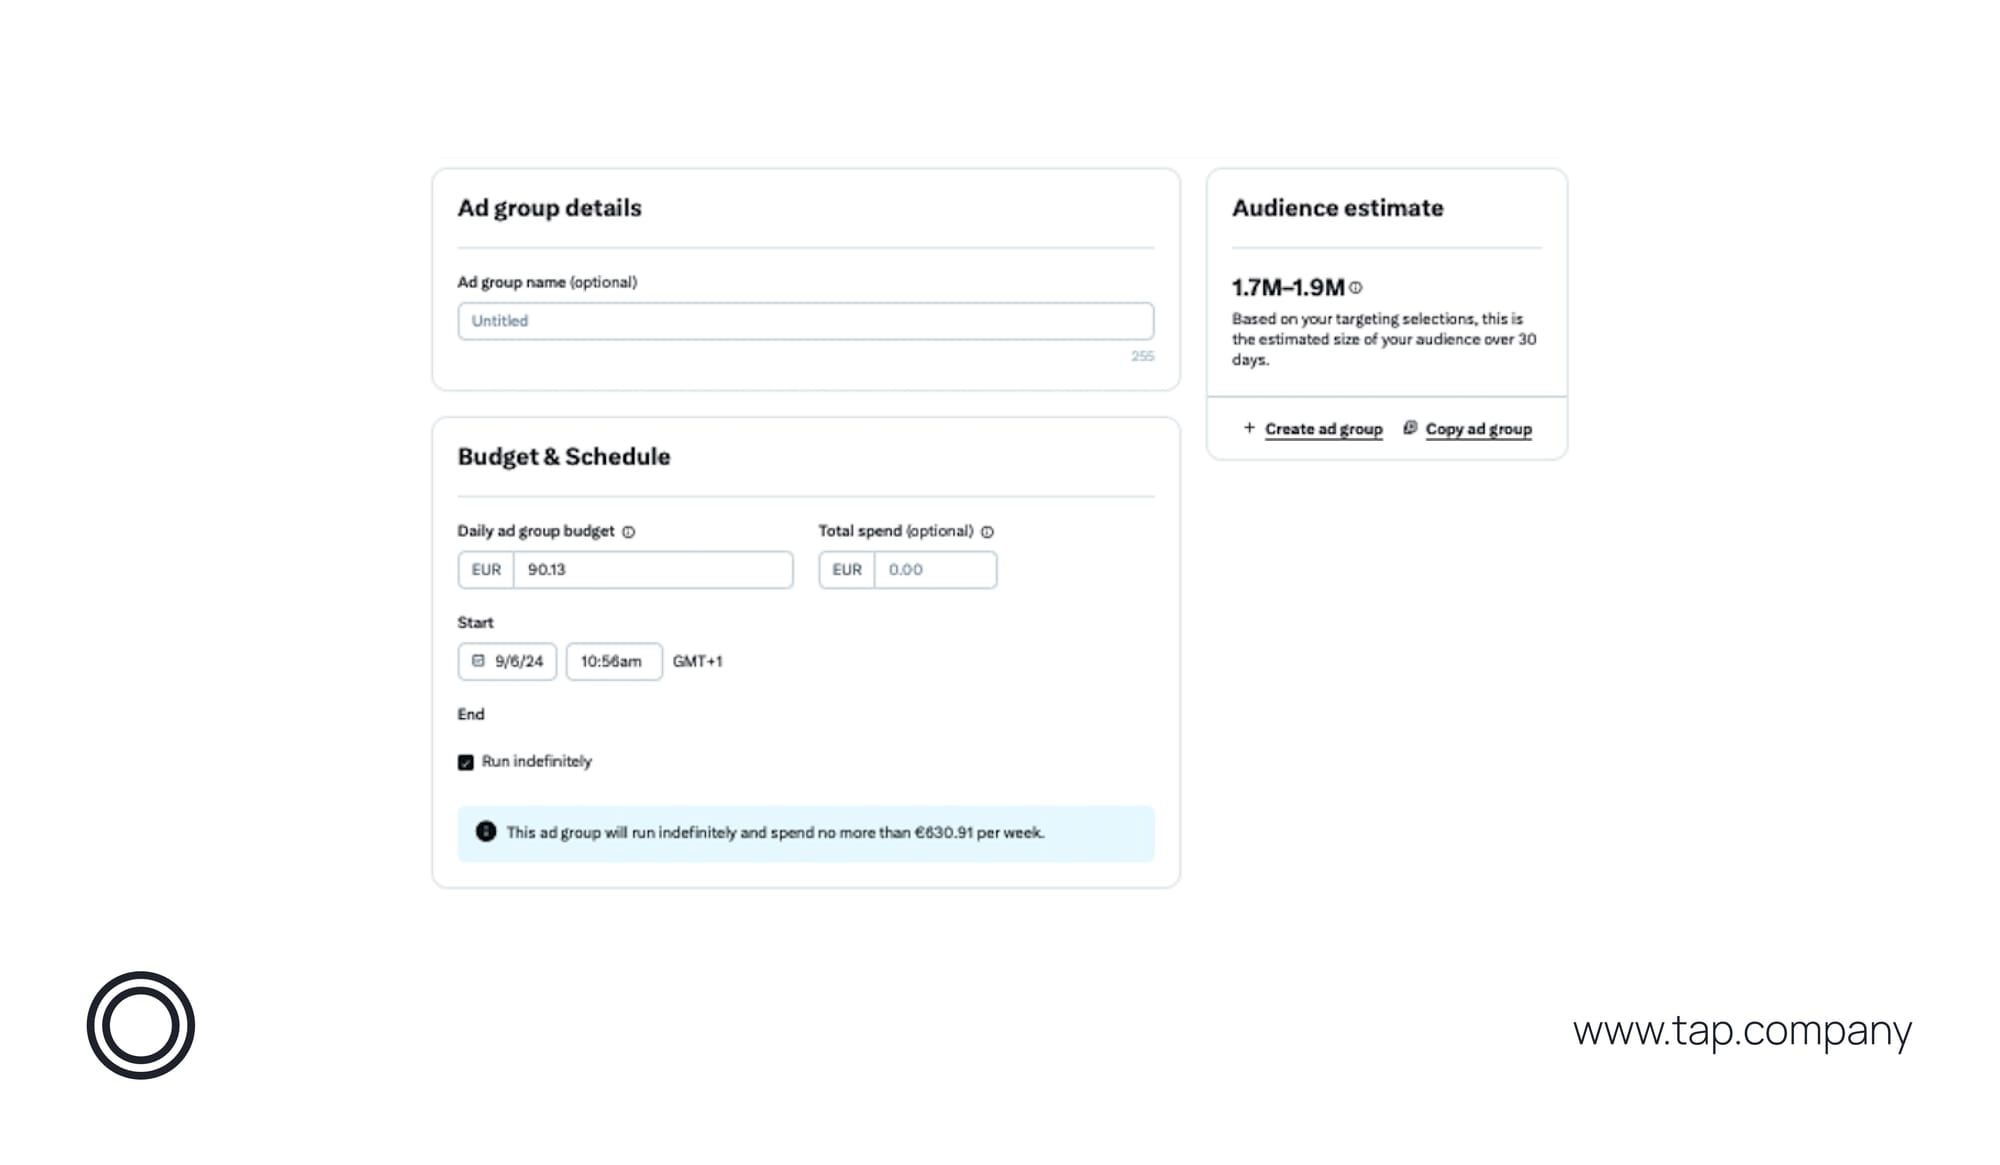
- Set Ad Group Name
- In the "Ad Group" section, name your group (e.g., "Group 1: Mobile Users").
- Click Next.
- Set Budget and Schedule
- Enter your Daily and Total Budget.
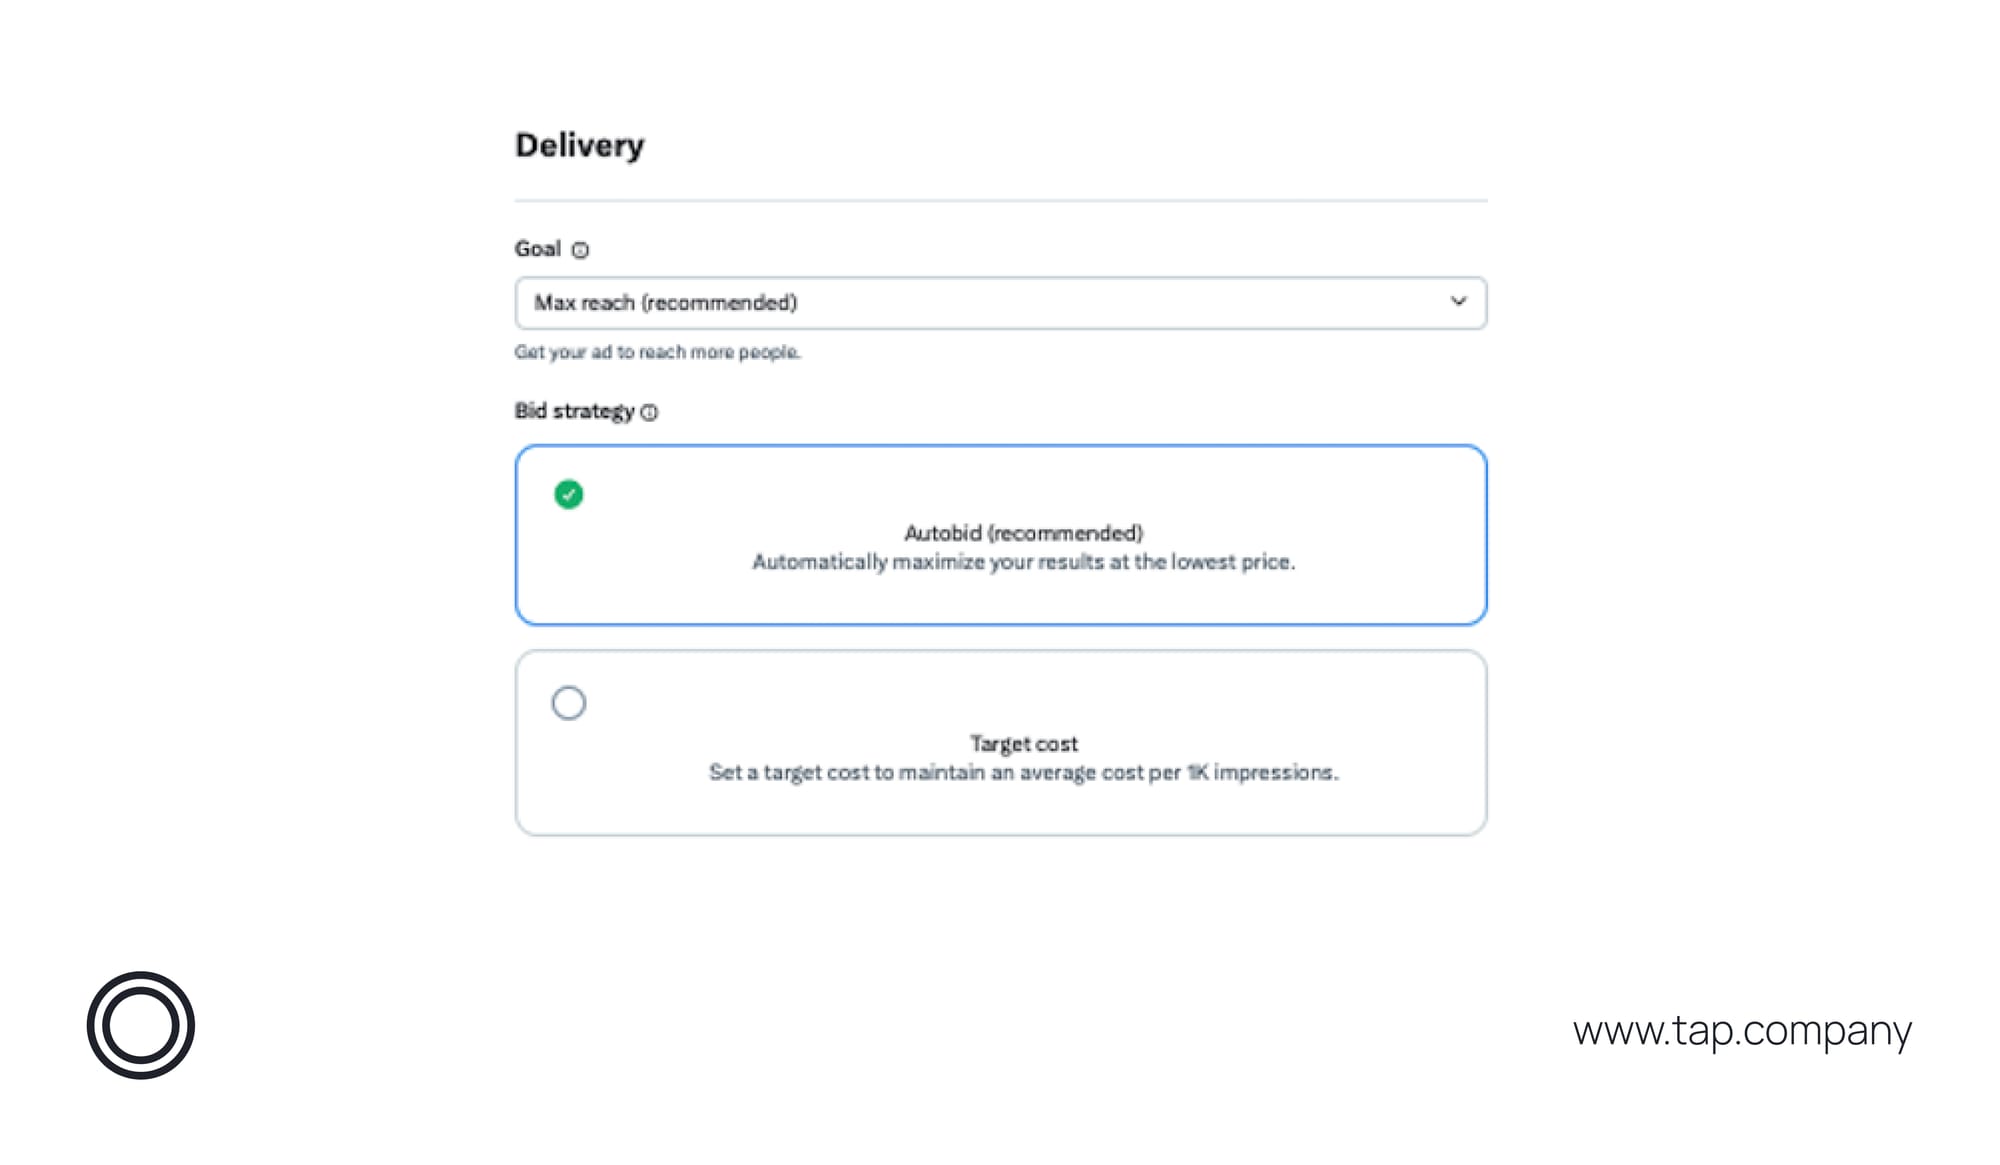
- Choose your Bid Strategy:
- Autobid: X will optimize bids for the lowest cost.
- Target Cost: Set your preferred cost per 1,000 impressions.
- Choose your campaign’s start and end dates, then click Next.
Step 3: Advanced Targeting
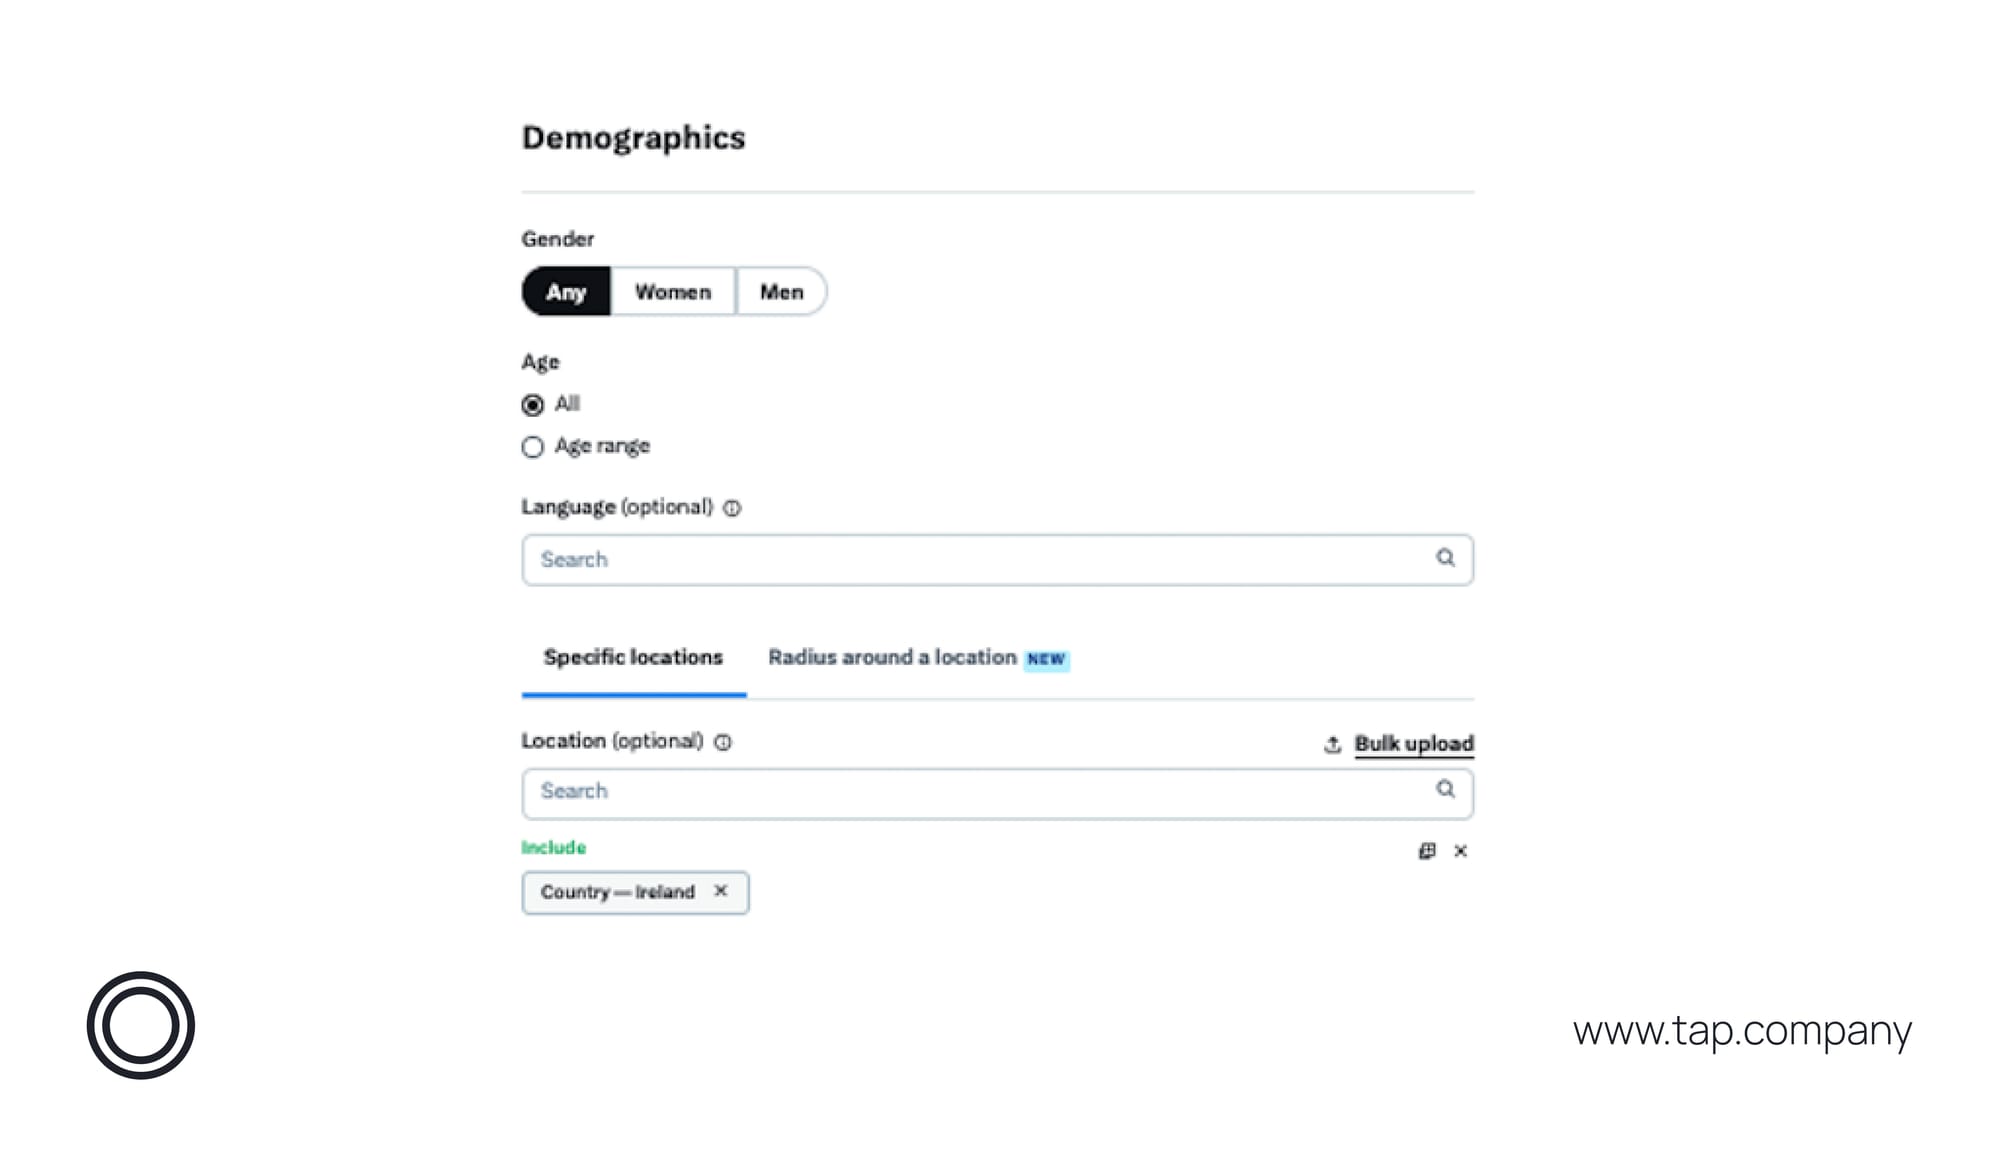
- Target Audience Demographics
- Choose audience parameters for age, gender, and language.
- Location Targeting
- Input specific regions or cities.
- Set a radius around locations to narrow your audience further.
- Device Targeting
- Choose whether to target mobile, desktop, or specific operating systems.
- Behavioral Targeting
- Use X’s behavior targeting to find people who frequently engage with similar content.
- Keyword Targeting
- Input keywords related to your business to reach users who tweet about those terms.
- Placement Options
- Choose where your ads will appear (e.g., in search results, on the timeline).
- Click Next.
Step 4: Conversion Tracking
- Add Conversion Tracking
- Go to Tools in the top menu.
- Select Conversion Tracking.
- Follow the prompts to install a X Pixel on your website.
- App Conversion Tracking
- If you're promoting an app, integrate with a Mobile Measurement Partner to track installs and in-app actions.
- Launch Campaign
Review your campaign and click Launch.
- How to Set Up Conversion Tracking for X Ads (formerly Twitter Ads)
Step 1: Set Up X Tag Manager
- Go to the X Ads dashboard and navigate to “Event Manager.”
- Create a new conversion event.
- Copy the X Tag code and paste it into your website’s header and footer.
Step 2: Set Up Conversion Tracking in X Ads
- In your X Ads dashboard, go to “Conversion Tracking.”
- Click “Create New Conversion Event.”
- Choose the type of conversion (e.g., purchases, sign-ups).
- Input your website URL and specify the action (purchase, form submission, etc.).
- Add the X Tag to your website either via X Tag Manager or manually on the post-conversion page (e.g., "Thank You" page).
Step 3: Test Conversion Tracking
- Use the X Tag Manager Chrome extension or X Ads Tag Helper to confirm that your tags are firing correctly.
- Monitor conversion data in the “Conversions” section of your X Ads dashboard.
This simple process will help you measure the effectiveness of your X Ads campaigns and track key conversions effortlessly.
Finally
You’re now fully equipped to run ads on X, set up billing, and track conversions to measure your campaign success. By mastering X ads, you can grow your audience, track the effectiveness of your ads, and optimize for better results over time.
With time and practice, you’ll become more confident in running X ad campaigns that help you grow your business.
Interested in enhancing your business with cutting-edge payment products? Visit our Website to learn more about Tap Payments and explore the possibilities in payments and fintech.


